
I started my adventure with ‘the master’s workshop’ over three decades ago, just tinkering with scraps of wood and some basic tools. At first, everything happened in small corners of the house, usually the dining room table, which earned me a fair share of eye rolls and “not again!” comments from my wife. Accidental marks from hand tools occasionally showed up, much to my wife’s frustration. But that spark for making things by hand never went away. As life switched up, so did my workspace and approach. Each new space changed how I worked, welcomed others into the process, and taught me lessons I’m still learning. Here’s a look at how The Masters Workshop has grown, what it’s about, and what you’ll stumble upon if you stop by for a visit.
The Early Days: Getting Started with Woodworking
My adventure into woodworking started with a simple curiosity and the kind of enthusiasm that makes you think anything’s possible. I didn’t have a dedicated workshop at first. Most of the action happened in the dining room. At the time, I had a few hand tools; no fancy equipment, just the basics like a handsaw, some chisels, and a couple of clamps. Hand tools kept the noise down and limited the sawdust to a manageable level, but every new project added a new scratch or nick to the family furniture.
As my skills grew, so did my interest in building more complex pieces. It got clear pretty fast that I needed a dedicated space (and my wife needed their dining room table back). That led to moving into a basement room in a different home we moved to, which became my first official workshop. It wasn’t huge, but it felt like a major upgrade. I set up a small workbench, used portable power tools and benchtop tools and started dreaming about what could come next.
Expanding the Workshop: Creating Dedicated Spaces
Life has a way of changing your plans, usually for the better. When we moved to a bigger house with a full basement, space was suddenly less of an issue. My wife got a main-level laundry room, and I got to expand the workshop. What started as one cramped room grew into a multi-room setup: a production space for building, a finishing area for staining and finishing, and even a dedicated classroom.
That classroom space was a game changer. I started teaching woodworking to homeschooled kids, turning projects into lessons about math, patience, and creative problem solving.
Eventually, Thursday night adult classes started, first as a men’s group through my church, then a women’s group when word got out that woodworking was actually a lot of fun. These sessions weren’t just about building things, they were about learning, laughing, and sometimes just catching up over sawdust and coffee.
the master’s workshop: Where the Name Comes From
When it came time to start selling a few pieces at local craft shows, I had to think about a name that said something about who I am and what this workshop means to me. “the master’s workshop” just felt right. It hints at craftsmanship, but there’s more to it. I’ve always believed my inspiration, talents, and materials are gifts, not just “my own.” In that sense, the real Master in my workshop is Christ, and it is this purpose I try to put into every piece and every lesson. It’s not about showing off, but about recognizing where the skill comes from and sharing that with others.
You’ll see references to “associates” on some of my older business cards and craft show signs. That always made me laugh, because my “associates” were just friends and family who’d pitch in from time to time. I never had a formal crew, just a rotating cast of helpers who showed up when I needed an extra hand, or I helped them with their projects in return.
Changes in Space: Adapting to New Workshops
Over the years, my workshop has taken on a few new shapes. After a long stretch in the big basement shop, we moved to a house where the only space available was an 8-by-20 foot shed in the backyard. That place was definitely snug, but I learned how to make the most out of every inch. I kept producing gifts, small furniture, and custom signs in there, proving you don’t need a huge footprint to be creative.
Eventually, we ended up in a place with a basement again. Stepping back into a larger open shop space brought its joys. While this latest shop doesn’t have separate rooms like before, I’ve set up different zones—one for cutting, one for assembly, and one for finishing. The vibe is relaxed, and honestly, it’s just a space to get messy, try new things, and see where the wood takes me. No two days are quite the same, and that’s part of the fun.
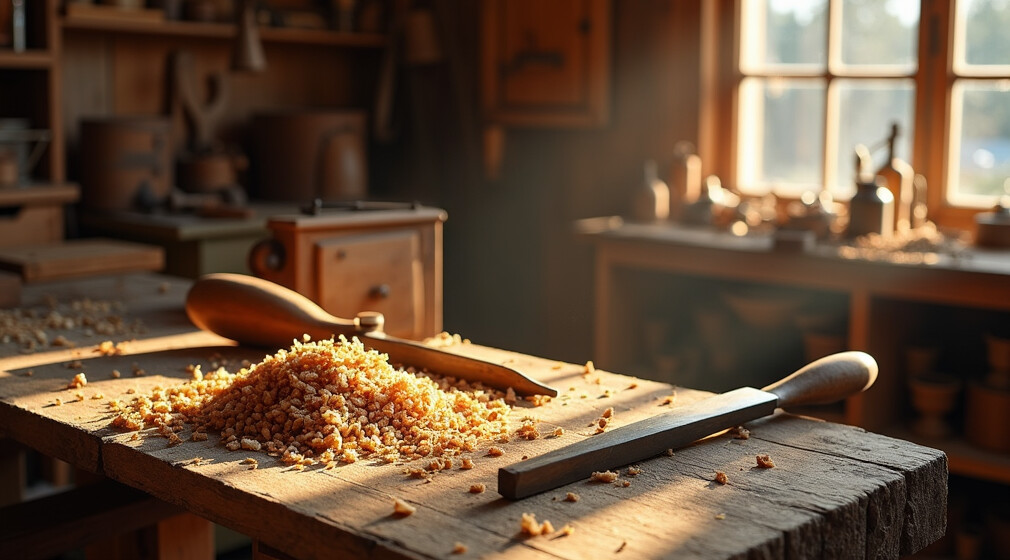
What the Shop Looks Like: A Real-World Space
My workshop isn’t fancy. I’ve got tools from all sorts of brands; most of them picked up secondhand or on sale. You’ll most often find sawdust on the floor and projects in various stages lying around. I’m not running a showroom or a magazine-perfect setup. Instead, the focus in my shop is on getting things built, making things work, and helping anyone who’s interested in learning along the way. If you ever see photos of the workspace on the website, don’t expect a spotless environment; expect a real one.
What You’ll Find on The Master’s Workshop Website
The main focus of my website is woodworking. I post articles on different techniques, hands-on project ideas, tool reviews, and tips for making your own shop workable (even when space is limited). The topics are driven by what’s happening in my workshop, questions I get from readers, and the kinds of stories that pop up when you spend enough time around wood and tools.
Alongside woodworking content, I sometimes share personal stories, memories from past projects, funny mishaps, or moments that made me appreciate family and the people around me, or even a story to help encourage you in your faith. There might even be a story or two featuring my wife, who’s been a silent partner through it all (and still prefers her laundry room to my sawdust).
Getting Started: Woodworking Tips for Newcomers
If you’re thinking about picking up woodworking or improving your workshop, here are a few tips from someone who’s learned plenty by trial and error:
- Start with the Basics: Don’t feel like you need every tool under the sun. Most projects can be done with a few reliable tools. Learn how to use hand tools safely before moving on to larger power equipment.
- Make Space Work for You: Big shop or small shed, the setup matters less than your willingness to get creative with storage and workflow. Stackable bins, mobile workbenches, and wall racks can make even tight quarters usable.
- Embrace Mistakes: Every dent, scratch, or miscut is just part of the story. You’ll get better with practice, and sometimes the best solutions come from working around a goof.
- Don’t Skip Safety: Eye protection, hearing protection, and dust collection don’t need to be expensive. I’ve had enough close calls to know it’s worth prioritizing safety every single time.
Sharing What I Know: Teaching, Community, and Why It Matters
Some of the most rewarding parts of the master’s workshop have come through teaching and sharing the space with others. The classes originally started as a way to help people learn a new skill, but they became little communities where people could relax, create, and talk openly. It never ceases to amaze me what gets built when people come together, encourage each other, and try new things as a group.
If there’s one thing I’ve learned, it’s that woodworking brings people together. That’s true whether you’re making a project for someone you care about or learning how to dovetail a joint with a neighbor. You never know what stories or friendships will come out of one Thursday night class.
What You Can Build: Project Ideas, Plans, and More
On the website and in the shop, I keep things practical. You’ll find project ideas for all skill levels, from simple coat racks and picture frames to larger furniture and segmented bowls. Every plan comes with honest talk about what works, what to watch out for, and which tools make the process easier (or just more interesting).
I regularly challenge myself with new designs or try to solve everyday problems through woodworking. If you have a project idea or a nagging question about materials, chances are I’ve either given it a try or am game to experiment together. Sharing the outcome (messy steps included) is a big part of why the master’s workshop exists.
Common Obstacles and Tips for Overcoming Them
- Limited Space: One of the top struggles. Using vertical space for storage, rolling workbenches, smaller benchtop power tools, and collapsible work surfaces can help maximize even the tightest spots.
- Tool Budget: Quality tools can get pricey. Look for used equipment, swap with friends, or borrow when possible. Prioritizing one tool at a time (like a solid cordless drill) goes a long way.
- Finishing Techniques: Getting a smooth, even finish takes time. Start with water-based stains or wipe on polyurethanes if you’re new since they’re forgiving and easy to manage in small spaces. DON’T SKIP on the sanding. A good finish starts with a properly sanded project.
- Staying Motivated: Sometimes projects go sideways. Keeping things fun, setting realistic expectations, and sharing progress with friends helps keep the process enjoyable. One of my favorite movie quotes is from a Tim Allen movie, ‘Galaxy Quest’. His character’s tag line is ”Never give up, Never Surrender.” That is the way I feel about woodworking. Something may go wrong, but don’t give up and don’t surrender. The next day will be better.
Advanced Moves: Gaining Skill and Confidence Over Time
Once you’ve got basic joinery and safe practices down, try your hand at:
- Learning New Joints: Experimenting with different techniques like mortise and tenon, box joints, dovetail joints, and even router inlays add depth to your skills.
- Using More Complex Tools: Slowly adding routers, table saws, or even a lathe to your toolkit opens up new project ideas.
- Experiment with Finishing: Playing with stains, paints, and woodburning can create custom looks and keep things interesting.
- Design Your Own Plans: Once you’re comfortable building from existing plans, try sketching your own or modifying a project to better fit your needs. That’s often where you’ll have the most fun and learn the most.
Popular Questions About the master’s workshop
Why call it “the master’s workshop” if you’re not claiming to be a master?
For me, “master” isn’t about showing off skill. It’s about recognizing that my abilities and resources are gifts. The workshop is a place where I do my best and let the results speak for themselves. It’s also a nod to my faith in Christ and the sense of purpose I bring to what I build.
Do you teach classes, and how can I join?
I offer hands-on classes when there’s enough interest and time. The best way to hear about them is by following my website or dropping me an email if you’re local. Classes are casual and include all skill levels; no experience needed, just curiosity and patience.
What if I don’t have many tools or space—can I still start woodworking?
Absolutely. Some of my favorite projects started with just a handsaw and a few clamps on a tiny workbench. There are plenty of beginner-friendly projects and techniques designed for smaller spaces.
Can I submit a project idea or question to the website?
Yes! I welcome suggestions. If there’s something you want to see, or if you have a tip worth sharing, send it my way.
What Makes the master’s workshop Different
This workshop isn’t about perfection or high end, gallery ready builds. It’s about everyday creativity, learning from mistakes, and having a good time with others who care about making things by hand. Whether you visit the site for woodworking tips, want to join a group class, or just enjoy swapping stories, the goal is always to encourage growth and enjoyment in the craft.
New content gets added regularly. You’ll find practical how tos, tool reviews, and stories about what’s going right (or wrong) in the workshop. Videos, step-by-step guides, and downloadable plans are all in the mix, and I’m always looking for ways to expand what’s offered.
If you want a space that’s approachable, real, and rooted in genuine craftsmanship, the master’s workshop is worth checking out. Happy to have you here, and I’m always up for talking shop if you have questions or want to share what you’re working on.
If you stick around, you’ll also stumble upon some behind-the-scenes glimpses, photo tutorials, and a few more laughs from life in the shop and beyond. There’s always something new to jump into, so whether you’re a longtime craftsperson or just curious, you’re welcome here. Grab a cup of coffee, make yourself at home, and let’s get into some woodworking together.
Mike Grawvunder
the master’s workshop
© 5/12/2025